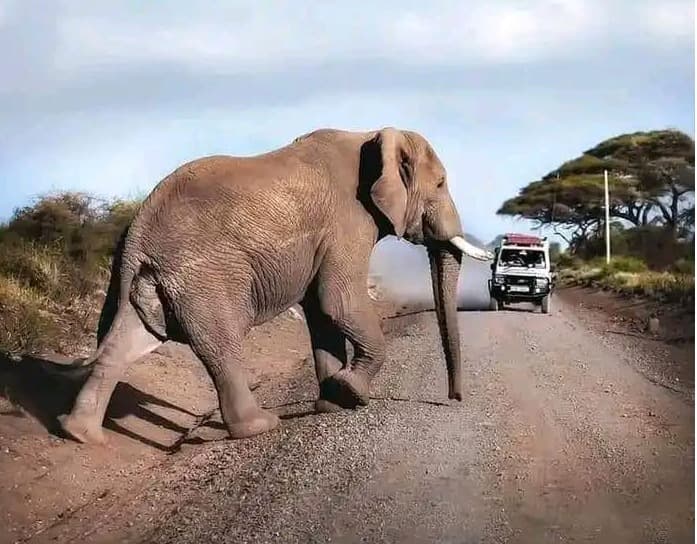
If you are comparing Everest trek formats, an everest heli return trek example is often the quickest way to understand how the trip actually works on the ground. The idea is simple - trek in through the Khumbu like a classic Everest Base Camp route, then return by helicopter from the upper region instead of walking all the way back to Lukla. For travelers with limited vacation time, or those who want the full mountain approach without repeating the same descent, this format is practical, efficient, and easier to plan when handled by an experienced in-country operator.
What an Everest heli return trek example really includes
A helicopter return trek is not a shortcut version of Everest in the usual sense. You still fly to Lukla, trek through the main Sherpa settlements, acclimatize properly, and reach the high-altitude highlights that make the route worthwhile. The difference is in the exit strategy.
Most itineraries follow the standard approach up the valley to Namche Bazaar, Tengboche, Dingboche, Lobuche, Everest Base Camp, and Kala Patthar. After that, instead of walking several days back down to Lukla, you board a helicopter from Gorakshep, Pheriche, or another operational pickup point depending on weather, landing conditions, and aviation planning. That saves several trekking days, but it does not remove the need for fitness, altitude awareness, or disciplined pacing.
This matters because some travelers assume a heli return means a low-effort Everest trip. It is not. It is best understood as a full trekking product with a premium and time-efficient return segment.
A practical Everest heli return trek example
Below is a realistic 10-day structure that many international travelers look for when trying to balance vacation limits, acclimatization needs, and comfort.
Day 1: Arrival in Kathmandu
Arrival, hotel transfer, trip briefing, permit check, and gear review. This is not just a buffer day. In Nepal, mountain flights and weather systems can shift quickly, so having a clear briefing and document check before departure helps reduce avoidable delays.
Day 2: Fly Kathmandu to Lukla, trek to Phakding
The mountain trip starts with the domestic flight to Lukla, followed by a short trek to Phakding. This first day is intentionally moderate. It allows the body to start adjusting while keeping the route manageable after an early morning flight.
Day 3: Trek to Namche Bazaar
This is one of the more demanding early stages, with suspension bridges, long uphill sections, and the first real feel of Everest region terrain. Namche is the commercial hub of the Khumbu and a key acclimatization stop.
Day 4: Acclimatization day at Namche
A proper acclimatization day usually includes a short hike to a higher viewpoint and return to sleep in Namche. This is standard high-altitude practice and should not be skipped to save time.
Day 5: Trek to Tengboche or Deboche
The route opens up with stronger mountain views, and the trail becomes more scenic and more exposed. Tengboche monastery is a major landmark, and overnighting nearby keeps the pace balanced.
Day 6: Trek to Dingboche
This stage moves into more alpine terrain. The tree line drops away, the air becomes thinner, and walking speed naturally slows. A well-managed itinerary accounts for this.
Day 7: Acclimatization day at Dingboche
Another acclimatization day is recommended here. Many rushed itineraries remove this stop, but that is one of the clearest signs of weak route planning. Above 14,000 feet, proper adjustment matters more than itinerary speed.
Day 8: Trek to Lobuche
The route becomes steeper and more austere. This is usually the point where altitude effects become more noticeable even for fit trekkers. Hydration, pacing, and guide monitoring become increasingly important.
Day 9: Trek to Everest Base Camp, return to Gorakshep
This is a long and demanding day. The trail to Everest Base Camp is not technical for most trekkers, but it is physically tiring because of the altitude and distance. You overnight at Gorakshep after the base camp visit.
Day 10: Hike Kala Patthar, helicopter return to Kathmandu
An early morning ascent to Kala Patthar gives the strongest close-up Everest view on the trek. After returning to Gorakshep, the helicopter flight brings you back to Kathmandu. Depending on operations, some itineraries route the helicopter to Lukla for refueling before continuing onward.
Why travelers choose the heli return format
The biggest advantage is time. A standard Everest Base Camp trek often takes around 12 to 14 trekking days plus arrival and departure logistics. A heli return product can reduce the overall duration while keeping the core trail experience intact.
The second advantage is physical load. Descending from Everest region is easier on the lungs than ascending, but it is still hard on the knees, ankles, and lower back. For travelers in their 40s, 50s, or 60s, or anyone managing old injuries, removing the multi-day descent can make the trip much more realistic.
The third advantage is weather and schedule flexibility at the back end of the trip. If your international flight home is close, a helicopter return can reduce the risk of losing several extra days on the trail. That said, helicopters are also weather-dependent, so this is a risk reduction tool, not a guarantee.
The trade-offs to understand before booking
An Everest heli return trek example looks efficient on paper, but there are trade-offs. The first is cost. Helicopter operations in the Everest region are premium services, and prices reflect aircraft logistics, fuel, aviation staffing, load limits, and mountain weather planning.
The second is that shared helicopter sectors may involve operational adjustments. If you book a group-sharing basis, seating, baggage limits, and pickup sequencing can change according to actual conditions. Travelers who want tighter control over timing often prefer private charter pricing, but that increases the budget significantly.
The third is expectation management. Helicopter return does not mean guaranteed direct pickup from the exact point you prefer. Aviation decisions are based on safety, weather, visibility, and local operating conditions. Any serious operator should explain that clearly before the trip.
Who this itinerary suits best
This format is well suited to travelers who want a real Everest trekking experience but cannot commit to a longer round-trip trek. It also works well for couples or small groups looking for a more comfortable finish, and for premium travelers who value time efficiency without losing the core walking journey.
It is less suitable for travelers trying to minimize cost above all else. In that case, a standard return by foot is more budget-friendly. It may also be less ideal for people who specifically want the classic sense of completing the entire trek both in and out on foot. For some trekkers, that traditional rhythm is part of the achievement.
Cost drivers in an Everest heli return trek example
Pricing usually depends on season, group size, hotel standard in Kathmandu, guide ratio, porter services, domestic flight arrangements, permit inclusion, and whether the helicopter sector is shared or private. Spring and fall are the main trekking seasons, and premium demand is highest then.
A lower headline price can mean reduced service depth, limited contingency support, or less clarity around what happens if flights are delayed. That is why itinerary comparison should go beyond the day count. You want to confirm permits, airport transfers, guide credentials, baggage handling, emergency procedures, and the operator's actual on-ground coordination capacity. In a remote region, execution matters more than brochure language.
Operational points that matter more than marketing
For Everest itineraries involving aircraft, the quality of the operator is not just a comfort issue. It directly affects trip reliability. A competent local team should brief you on baggage limits, weather-related delays, helicopter boarding procedures, altitude considerations, and backup planning if Lukla or upper-region operations are disrupted.
This is where a logistics-focused company like Shepherd Holidays adds real value. The route itself is famous, but the difference between a smooth trip and a stressful one often comes down to pre-departure clarity, permit handling, guide supervision, and how well the team manages changing mountain conditions.
How to evaluate one itinerary against another
When reviewing an everest heli return trek example, look at the structure before the price. Does it include two real acclimatization days? Does it place the helicopter after the main high-altitude objectives rather than too early? Is the pickup point realistic for the season and route? Does the trip allow enough buffer for mountain flights at the start or end?
You should also check whether the itinerary is designed for your travel style. Some travelers want a compact 9- or 10-day version and accept a faster pace. Others want an 11- or 12-day plan with more margin for recovery and weather. Neither is automatically better. The right choice depends on your fitness, altitude history, budget, and how tightly your international schedule is built.
If you are weighing Everest options and want speed without losing the essence of the trail, this format is one of the smartest compromises available. The best version is not the shortest one on paper - it is the one that balances altitude safety, realistic aviation planning, and enough structure to let you enjoy the mountain instead of worrying about the logistics.